
How to prepare a garden bed for vegetable growing? 10 steps for healthy soil and a better harvest
How to prepare a garden bed for vegetable growing?
10 steps for healthy soil and a better harvest
A well-designed and managed vegetable plot can produce a lot of food. This is true for small and bigger areas. Reducing the amount of vegetables you are buying from conventional sources is a first strong step towards food democracy. Sourcing from Community Supported Agriculture initiatives (CSA) are connecting you with local farmers around you. But by turning whatever size of land into a productive vegetable plot that are in line with the 3 ethics of permaculture earth care, people care and fair share, you can even go further. This article showcases how to prepare your garden bed in 10 steps no matter if you are a gardener or a small-scale farmer.
If you want to experience and learn more about gardening and permaculture, you might want to join our next 17-day PDC starting in November 2020. Get all the information right here! For the time in between, we highly recommend our Free Online Permaculture & Resilience Course. Start today, no registration needed.
Author: Lars Blume
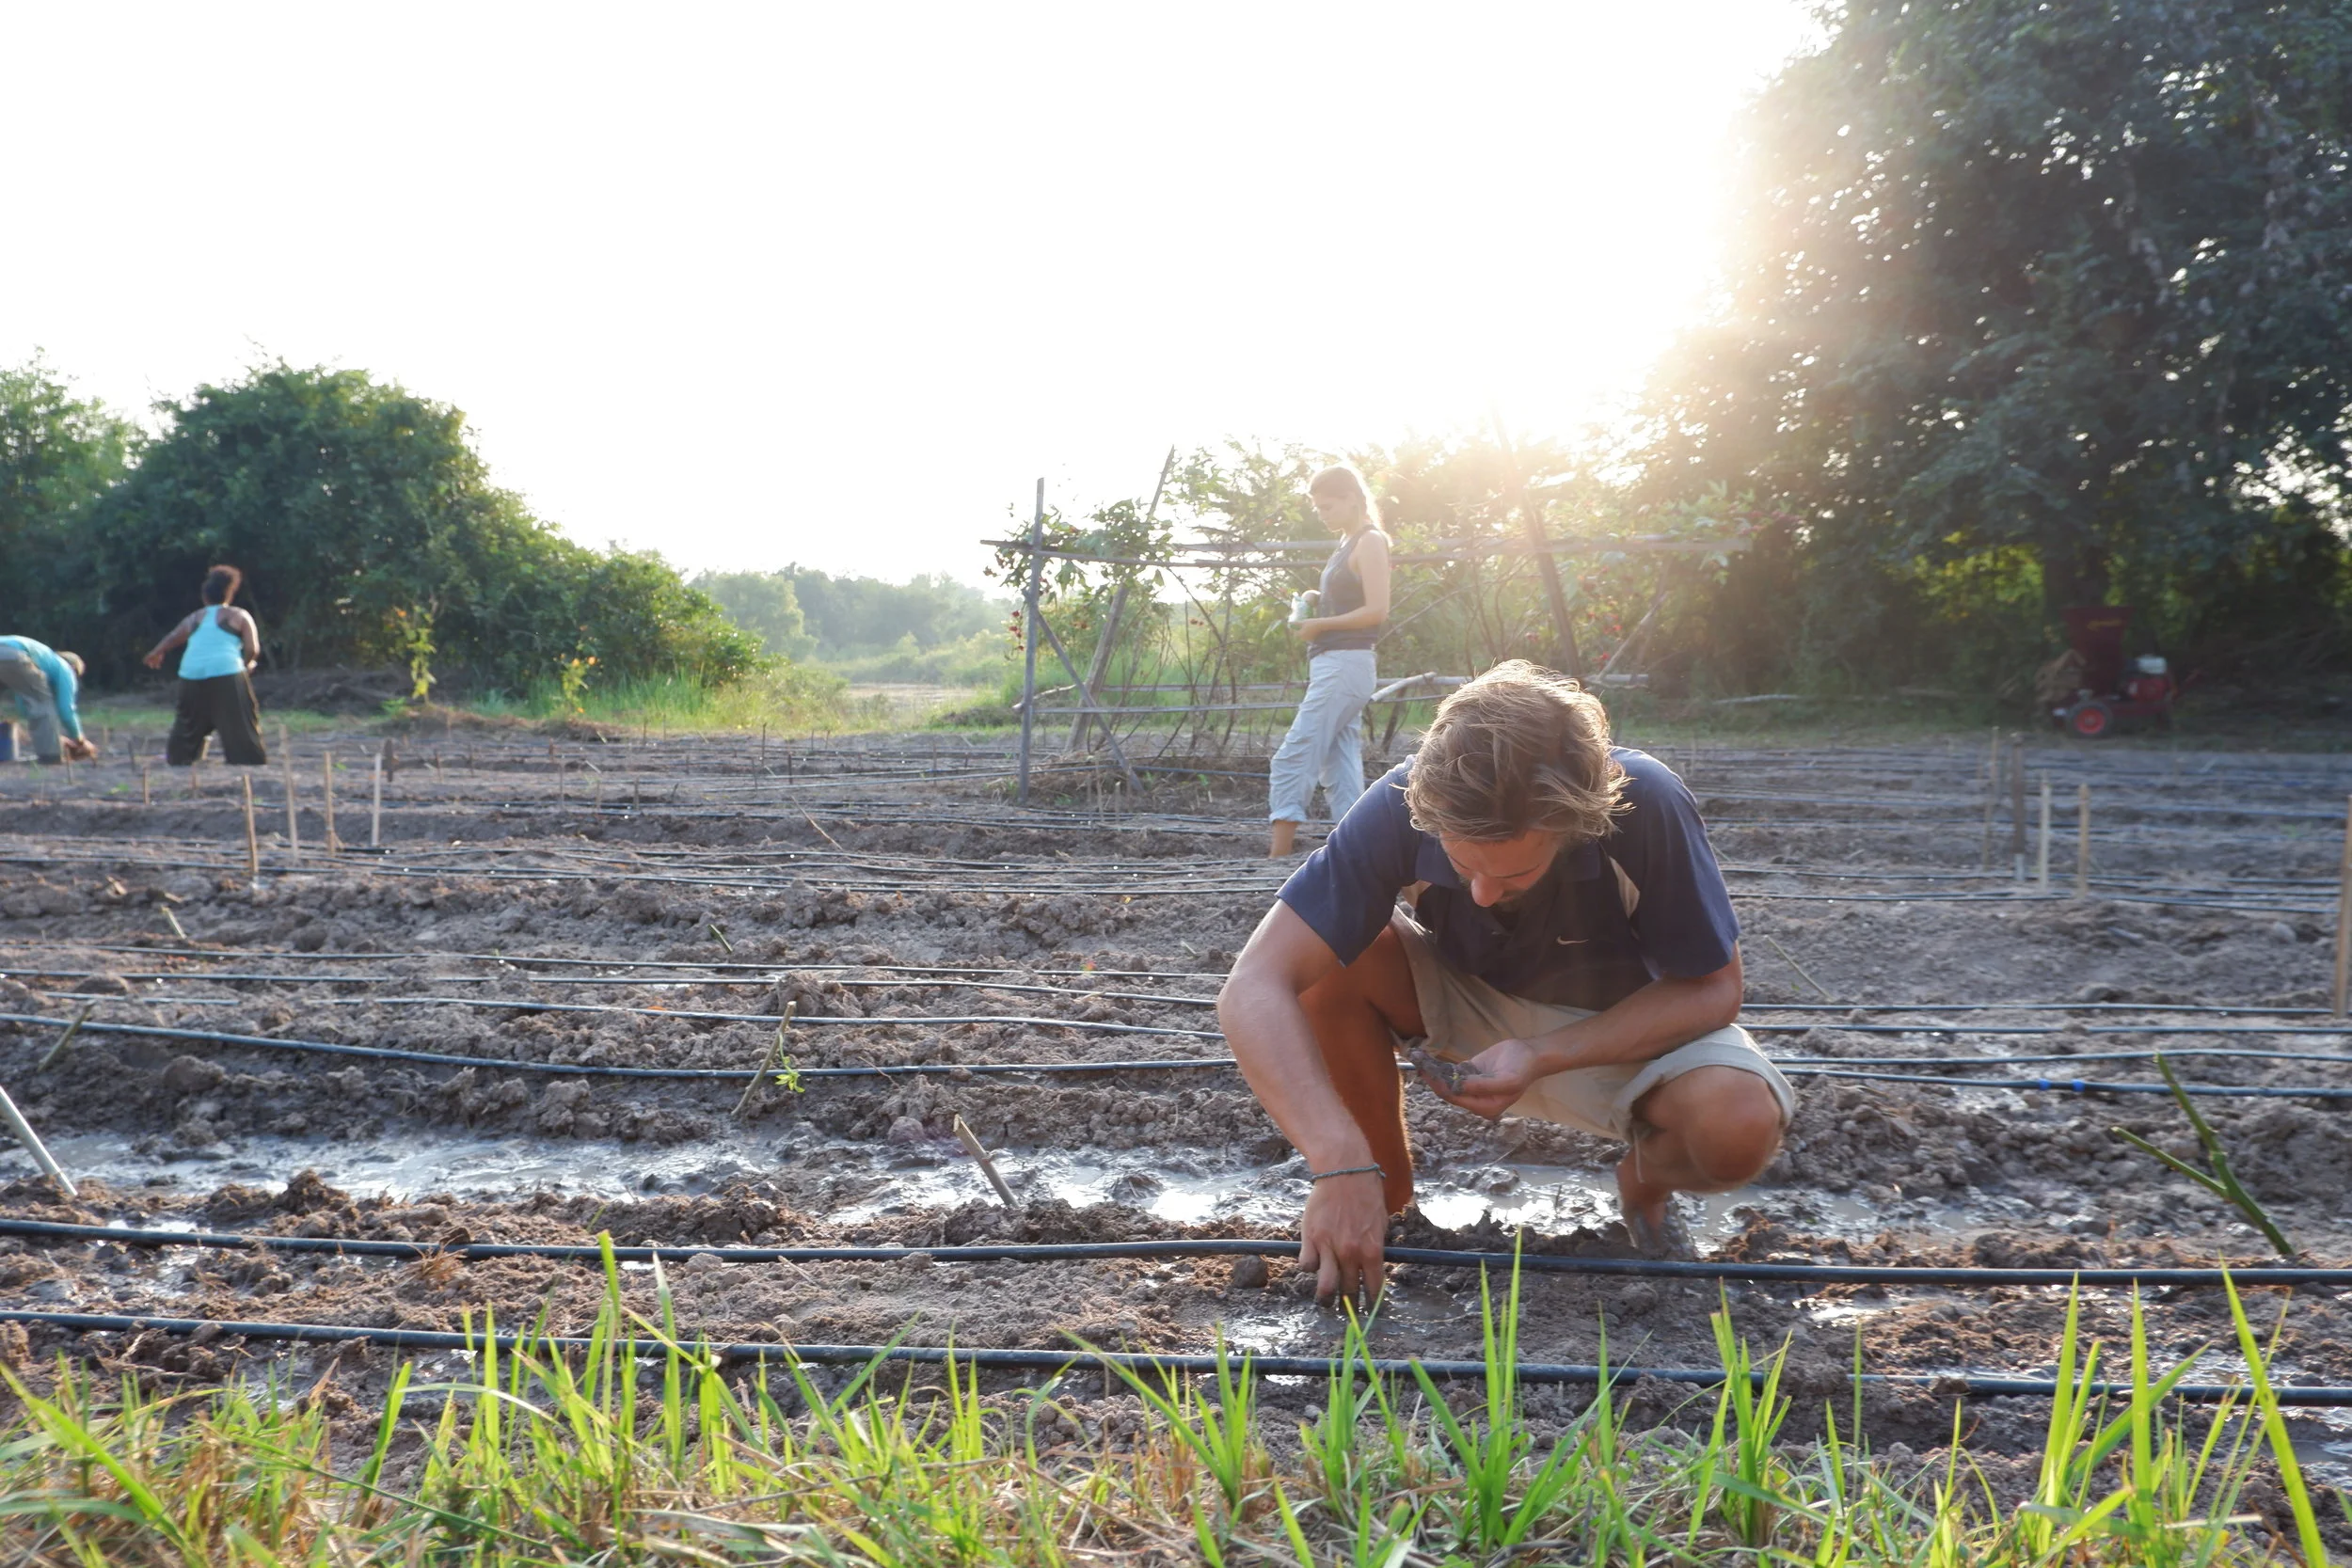
Planting seeds on large-scale garden beds. Photo: Julien De Backer
How to prepare a garden bed that is following the principles of natural farming and permaculture?
If you are following Masanobu Fukuoka’s natural farming approach you are reducing your impact on the land to a minimum and let nature do its chores. This is a great way to go; however it requires patience and some practice. For me, it is more the second stage of gardening; after exploring and experiencing gardening in a more classic manner. But why not dedicating one fraction of your garden or farm into a natural farming trial plot first?
Permaculture principles are also proposing to reduce your impact on nature to not disturb the web of life in the soil and team up with the forces of nature. However, especially in the first phase of the implementation of a permaculture design interaction is needed to support nature to be more productive.
The example this article will focus on did some bigger interactions first to get the garden beds in shape. If you feel that they are not matching with your gardening or farming principles, you can jump over this step. However, you should make sure that you are enriching soil and fertility.
I’ll explain the 10 steps of gardening by reference of the long beds at Gaia Ashram.
Weeding and checking your soil’s pH
Preparing a new plot of land or one that was just in use should start with proper weeding. Getting rid of weeds and weed seeds at the very first step will make your life much easier in the later stages. Even if you will work with ground cover plants around your main crops a good weeding is highly recommended. It also gives you some time to check in with the existing soil, have a look for organic matter in your soil and it gives you important insights about your current soil quality. If at hand, a soil pH test might be a good additional tool to see if your soil is too acidic (below 7), too alkaline (above 7), or neutral (7). One way of increasing the pH value and make the soil more alkaline would be adding lime. The easiest way to lower your pH level is adding organic matter especially from acidic plants such as pine, bamboo etc.
Tilling or no-tilling

Large-scale gardening sometimes is easier using smale-scale farming tools. Photo: Julien De Backer

Loosening the soil is something you can also do by hand or even can be skipped to preserve the web of life in the soil. Photo: Julien De Backer
It’s about loosening the soil and turning it. This step is not needed and if you are following the no-dig-gardening method just jump over it and continue with the next step. The part of the land where the long beds are located is flooded during the rainy season. Most of the organic matter is washed away and the bare soil is left behind. Thus, we decided to go for the tilling step and even make use of one of the smaller machines that helps to work on bigger scale. I personally would try to avoid machines as much as possible and work with other techniques to get a better understanding of the soil and the conditions, but it definitely speeds up the process.
Making your vegetable beds
This is the ultimate step that will have a massive impact on how easy your work on the field and garden beds will be in the future. You are structuring the plot of land into beds and paths. Like mentioned in an earlier post, you want to optimize the bed to path ration without lacking access for tools and reachability to all parts of the beds without leaving the paths. In order to utilize as much as possible of the prepared space it is good to value the edges and bring them into production. At the same time you want to create a natural weed barrier or even an insect attraction.
Nourishing the soil and working on the pH values
In order to add nutrients to the soil, a first round of adding animal manure or as a vegan option going for green manure is a great first move. Furthermore, human urine is rich in nitrogen, potassium and phosphorus, which are the nutrients plants need to thrive. The urine of one person can fertilize about 1m2 of soil a day. As healthier the lifestyle of a person the better is the quality of the urine. Depending on the pH content of your soil it might be good to add lime or acidic organic matter.
Creating a fast compost mix

A bamboo stick split in half is a quick and handmade tool to level the garden beds. Photo: Julien De Backer

Watering the compost mix with human urine and water. Photo: Julien De Backer
In the preparation phase of the planting season or if you start gardening on a new piece of land it might be good to put some extra love and care to the soil. One possibility is to create something like a ”fast compost mix“. The one we prepared had the following ingredients: green material like nicely chipped fresh wood and other fresh and green material; brown matter, also small and chipped to increase the composting effect; some human urine to booth the nutrition level and some fermented fruit juice to give some life to the entire pile. You also can add some manure but you can do it plant based as well. Let the pile sit for 2 or 3 days to get the composting process going before spreading it on the land. Avoid weed and weed seeds for the brown and green matter in order to not spread the weed seeds on your newly prepared land. You can use weeds to make a weed tea out of it by letting it sit in water for two weeks and spreading the tea on your fields after. If you created too much compost, it is great to do compost tea out of it by just leaving it in water for two weeks.
Level the beds
Leveling the bed with a half cut bamboo stick or a wooden slat ensures that you can plant on an even surface. More important: it helps to ensure that the water is distributed equally around the garden beds. If you decided to jump over the tilling step, this step might be also not needed and you can continue with the next one.
Water access for your home grown vegetables
Before continuing it is important to ensure that you have a sufficient water access. This can be a water system, a tap to water with a hose or just enough rain during the growing season. To reduce the water use and also your manual input we reinstalled the water system from last year. Controlling the drip tapes and change the broken ones will reduce water wastage throughout the operation phase. In order to control the water flow and make it fit to the different plants it is good to put valves to control the water and give the right amount of humidity to each plant or plant row.
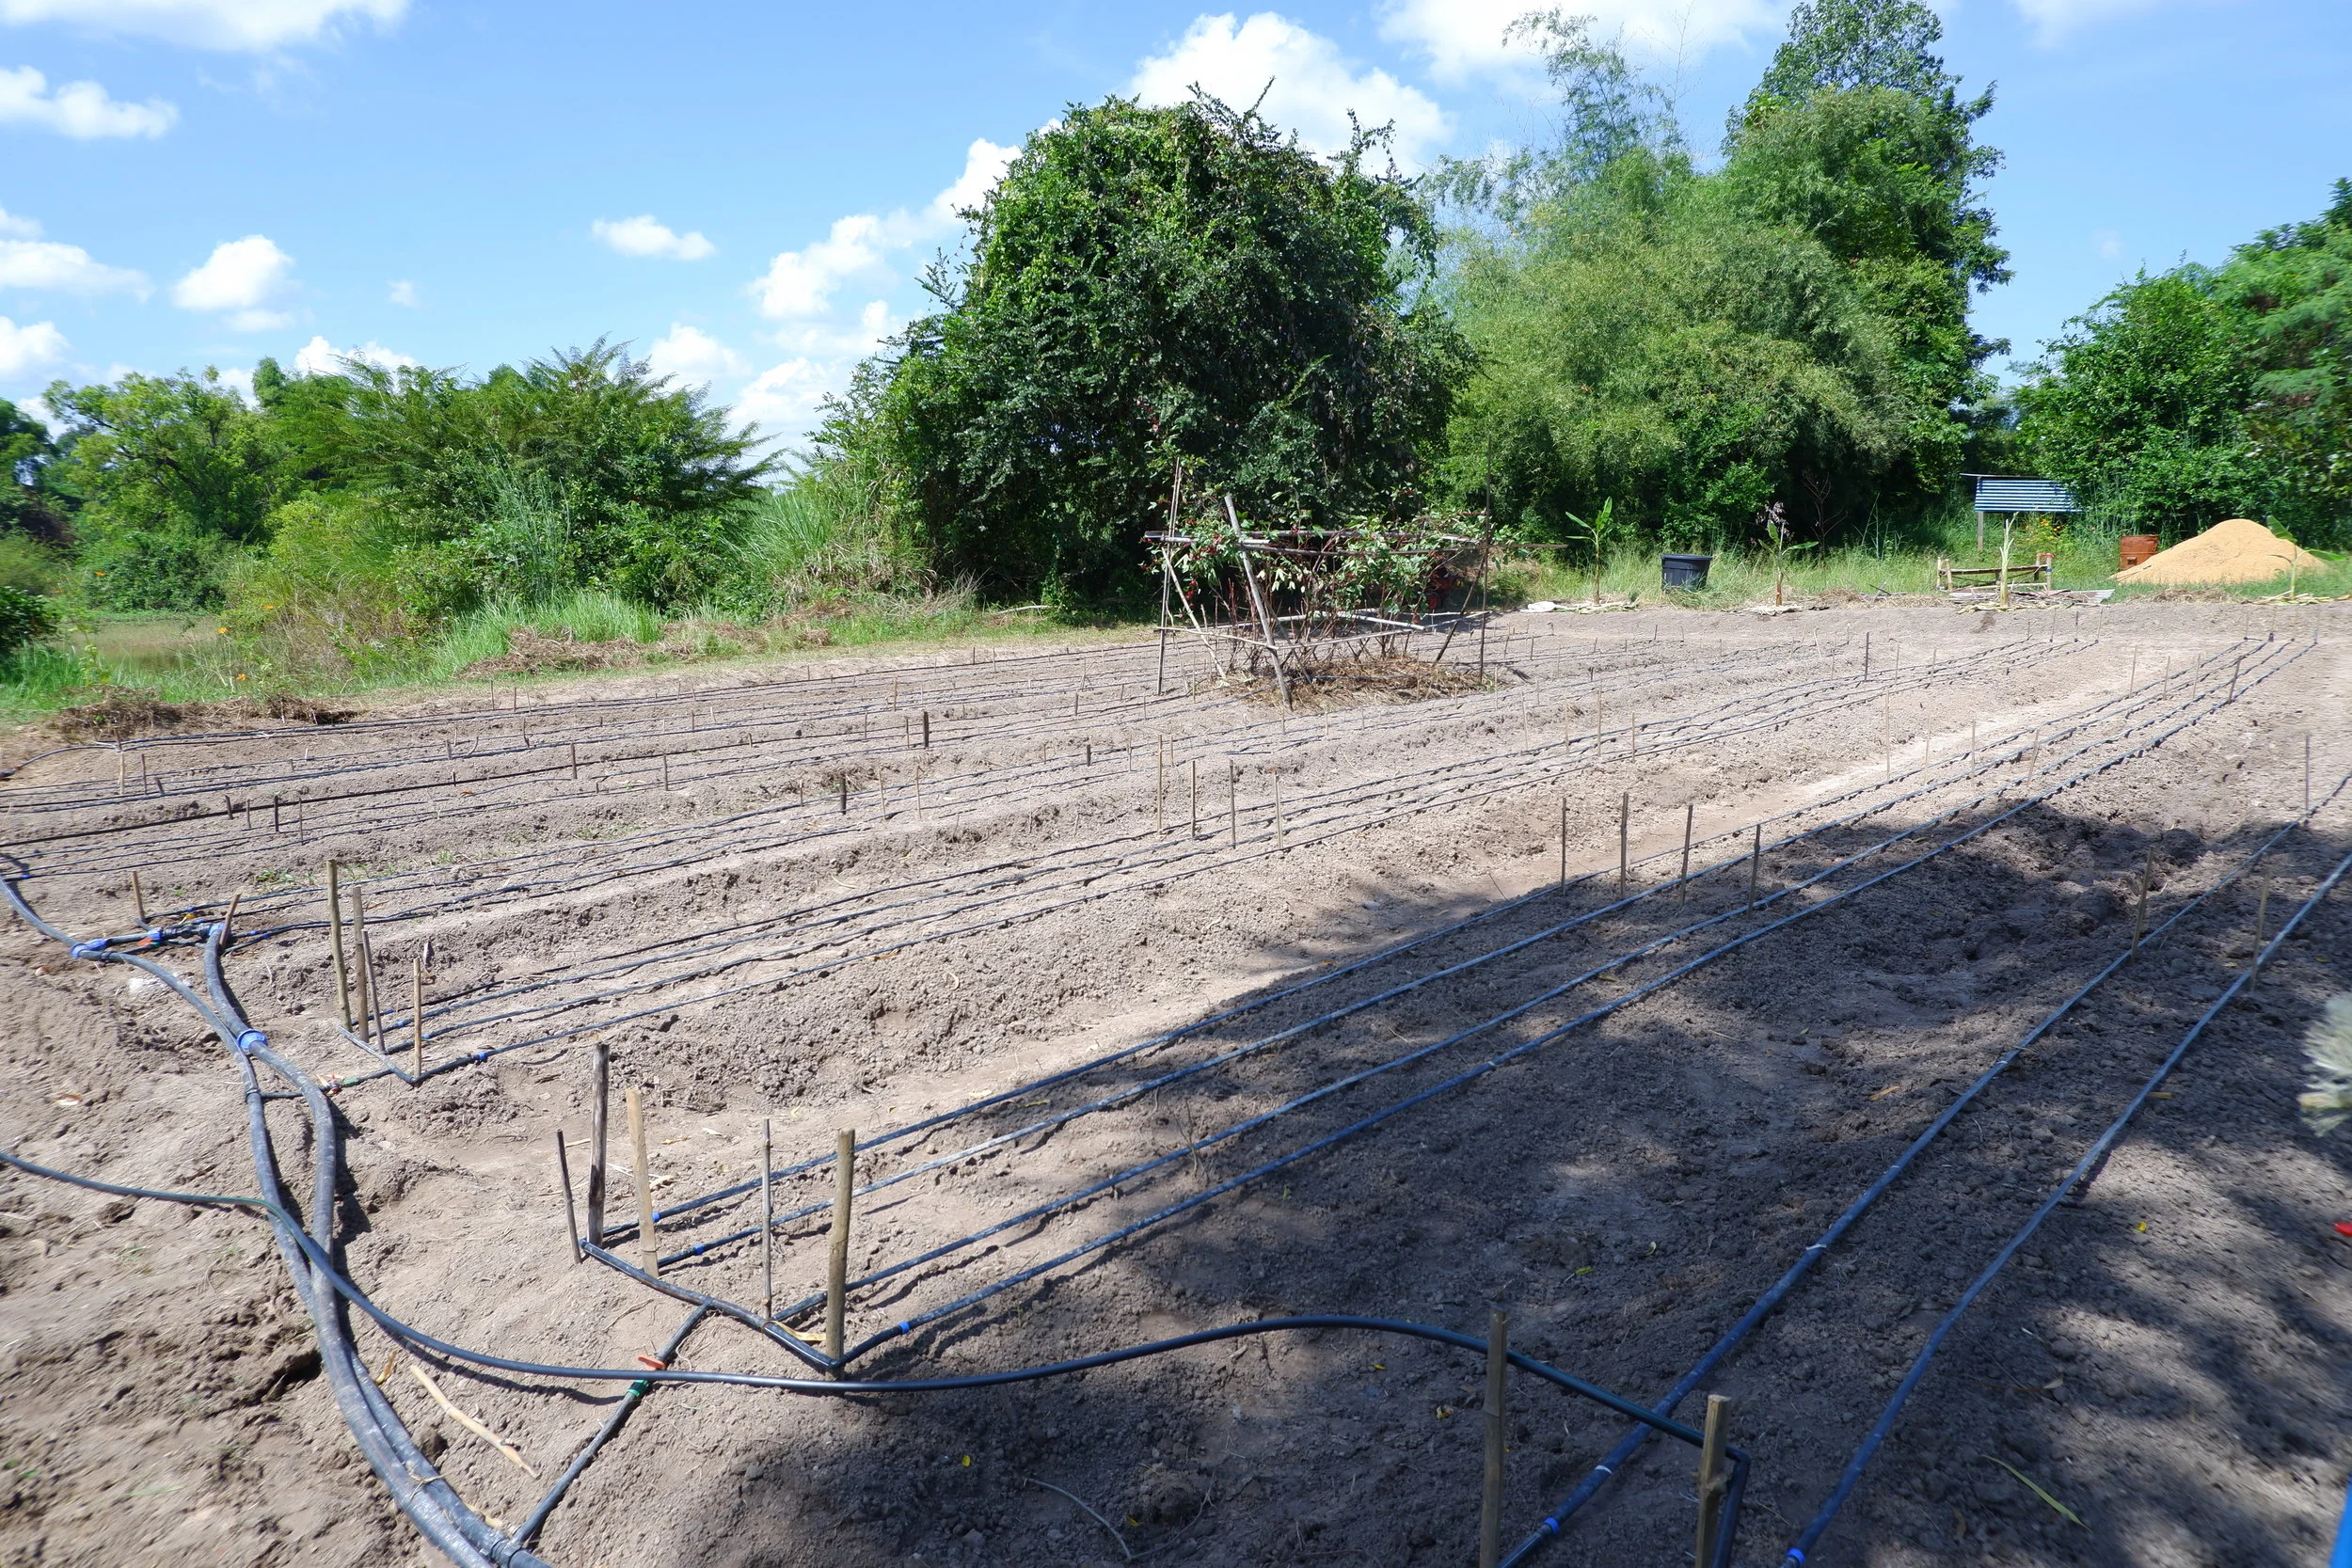
An automatic water system safes a lot of time and water when planting on a larger scale. Photo: Julien De Backer

Planting the edges gives extra space and protects your main crop from weeds. Photo: Julien De Backer
Planting
With slightly raised beds you can make use of the edges and plant some fast growing greens or nitrogen fixing beans or peas on the outside of each row. This way of planting is again in line with the 11th permaculture principle “Use edges and value the marginal” and protects the bed from weeds. In this stage you can also follow companion planning and put plants together that are supporting each other like the famous three sisters: beans, pumpkin and corn. The beans are using the corn to climb and give back nitrogen to the soil and the pumpkin is functioning as a strong ground cover that keeps the soil moist and controls the weeds.

Planting vegetables from seeds in one of the long vegetable rows. Photo: Julien De Backer
Mulching
After planting it is time for mulching. Use the already prepared compost mix and add a last layer of straw. It is important to give some space to seedlings or seeds so they receive enough light and are able to grow.
Replanting and maintenance

Creating fertile pockets for seedlings with compost. Photo: Julien De Backer

Mulching with straw brings a protective last layer against weeds. Photo: Julien De Backer
Especially in the beginning it is important to check regularly and replant if you see that some spots are empty or that seedlings just died. This will increase the yield and ensure an efficient water use. In a later stage it is important to maintain the bed by weeding and continuously adding mulch. This will stimulate the growth and rebalance the content of organic matter in the soil. Going back and harvesting when the first plants are ready is also very important and gives you the chance to check in again with the plants and the growth. As soon as one variety is ready to harvest you can plant a different variety on the same spot to make more use of the space and your initial input. By doing so you can use the garden bed throughout the whole growing season.
Happy gardening!
Want to learn more?
Gaia Ashram together with NextGenoa and flowful will organize a Permaculture Design Certificate (PDC) COurse between March 25 and April 10 at Gaia Ashram Thailand. You can find more information here or just drop us a message; we’re happy to hear from you.
At the moment we are designing the courses for our summer break (May/June) in Germany. We will have several weekend courses and also a PDC-Course happening. To get more information just write us a message; we will keep you posted.
If you want to experience a design process join one of our workshops or invite us to your property and become the host for the next workshop. Just drop us a mail for further information. Or just subscribe to our monthly newsletter.
Furthermore, you can join Gaia Ashram a community-based education center as a volunteer and learn more about gardening, spirituality and nature connection, For futher information check www.gaiaschoolasia.com.
Further read:

A well-designed and managed vegetable garden can produce a lot of food, even on a small plot of land. This article explores the 7 key success factors for growing vegetables for temperate and tropical climate and gives recommendations how to manage each factor.